I did this registry entry and it worked. Not sure how durable this is but for now it worked.
This was on an old Windows 7 upgrade to 10 and the lack of desktop refresh carried over. I have not often experienced this on many setups but nice to have a fix if is happens.
Friday, December 27, 2019
Thursday, December 26, 2019
No DVD Drive In Windows 10
Windows 10 has a bad habit of not showing your DVD drive in Device Manager.
It may be installed but "hidden" . . . Do this.

There may be other reasons and my guess, I will have ample opportunity to discover fixes.
Yes, I know, DVDs are a mostly obsolete. I keep a portable USB DVD in the closet just in case. But if your machine has an internal DVD it should be accessible (for crying out loud).
Tuesday, December 17, 2019


Sunday, December 15, 2019
Windows 7 Install To NVME SSD
I need to fine tune this description but . . .
Stuff you need:
1. This will insert USB 3 and NVME drivers into the Windows 7 ISO
https://www.gigabyte.com/Support/Utility/Motherboard?kw=windows+usb+installation+tool&p=1
This is for Gigabyte AMD boards. My board is Asus and yes Asus makes a version of this utility . . . and if anyone can figure out how to use it - let me know 😎
2. ImDisk Toolkit (If you don't have a thumb drive handy or want to speed things up) (hint: check the "removable media" box) (Or just use a flash drive and skip this step) It took 15 minutes on a RAM drive so good luck with a real thumb drive.
You may wish to not install shortcuts and context menu items. Access ImDisk through control panel.


3. ImgBurn (The driver insertion process extracts the ISO and you need to rebuild the ISO) (hint - etfsboot.com is the file to make the ISO bootable)
4. WinSetupFromUSB to create a multiple OS installation flash drive.
If you already have a multi boot flash drive with Win 7 install files, you can easily remove that file by deleting the setup files for Win 7 and editing the menu with Boot Ice. Then add the newly created version.
My NVME arrived today. Windows installed flawlessly. 😎😎😎
(If you don't count trying to find a Win7 LAN driver for a new motherboard. I had to use a USB WiFi dongle . . .)
I installed Win 7 first and updated so was stuck with MBR. Set BIOS to no UEFI.
Have only boot drive connected during install (old but true advice). You want the boot drive to be drive 0 in case you desire to convert to GPT later.
If installing 7 first or simply updating an existing Win7, you will have MBR. If you simply must have GPT for some reason - and your motherboard supports UEFI - Window 10 can convert MBR to GPT without data loss.

Why do I care?
Windows 7 is easily authenticated as genuine and updated to Windows 10.
If . . .
1. You have a product key sticker
...Remember to look inside the battery compartment 😎
2. Or use this crazy method. (Which is phenomenal)
...Using this method - Once Win 10 gets authorized, create an image. I tried reinstalling and the key Win 10 was using would not allow reinstall. I had to do the whole Win 7 setup dance again. Could have been a fluke but an image would save time.
3. On the other hand . . .
. . . We could use
. . .slmgr scripts (which actually work!).
https://www.youtube.com/watch?v=0wkHPQicR6s&t=196s
Smgr scripts last for limited periods. Not sure about auto renew yet.
To check your activation type
Window Key + R
slmgr.vbs /dli
If you have use the slmgr method you will see a result like this . . .

If it shows a partial product key you are golden with life long authentication.

4. Alternatively you can install an Auto KMS like Windows Toolkit or FrostRose (kmspico). Be careful where you download. (Hint = kmspico for Office 10 "psw 2016)
5. Or just buy a cheap key for around $15.
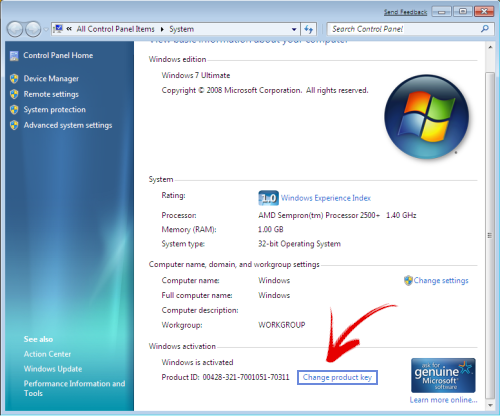
If "Change Producy Key" is not showing . . .
C:\Windows\System32> slmgr.vbs -ipk "INSERT-YOUR-PRODUCT-KEY"

Stuff you need:
1. This will insert USB 3 and NVME drivers into the Windows 7 ISO
https://www.gigabyte.com/Support/Utility/Motherboard?kw=windows+usb+installation+tool&p=1
This is for Gigabyte AMD boards. My board is Asus and yes Asus makes a version of this utility . . . and if anyone can figure out how to use it - let me know 😎
2. ImDisk Toolkit (If you don't have a thumb drive handy or want to speed things up) (hint: check the "removable media" box) (Or just use a flash drive and skip this step) It took 15 minutes on a RAM drive so good luck with a real thumb drive.
This Is An Outstanding Utility
You may wish to not install shortcuts and context menu items. Access ImDisk through control panel.

If flash drive is needed check "removable" otherwise leave unchecked.

3. ImgBurn (The driver insertion process extracts the ISO and you need to rebuild the ISO) (hint - etfsboot.com is the file to make the ISO bootable)
4. WinSetupFromUSB to create a multiple OS installation flash drive.
If you already have a multi boot flash drive with Win 7 install files, you can easily remove that file by deleting the setup files for Win 7 and editing the menu with Boot Ice. Then add the newly created version.
My NVME arrived today. Windows installed flawlessly. 😎😎😎
(If you don't count trying to find a Win7 LAN driver for a new motherboard. I had to use a USB WiFi dongle . . .)
I installed Win 7 first and updated so was stuck with MBR. Set BIOS to no UEFI.
Have only boot drive connected during install (old but true advice). You want the boot drive to be drive 0 in case you desire to convert to GPT later.
If installing 7 first or simply updating an existing Win7, you will have MBR. If you simply must have GPT for some reason - and your motherboard supports UEFI - Window 10 can convert MBR to GPT without data loss.

Why do I care?
Windows 7 is easily authenticated as genuine and updated to Windows 10.
If . . .
1. You have a product key sticker
...Remember to look inside the battery compartment 😎
2. Or use this crazy method. (Which is phenomenal)
...Using this method - Once Win 10 gets authorized, create an image. I tried reinstalling and the key Win 10 was using would not allow reinstall. I had to do the whole Win 7 setup dance again. Could have been a fluke but an image would save time.
3. On the other hand . . .
. . . We could use
. . .slmgr scripts (which actually work!).
https://www.youtube.com/watch?v=0wkHPQicR6s&t=196s
Smgr scripts last for limited periods. Not sure about auto renew yet.
To check your activation type
Window Key + R
slmgr.vbs /dli
If you have use the slmgr method you will see a result like this . . .

If it shows a partial product key you are golden with life long authentication.

4. Alternatively you can install an Auto KMS like Windows Toolkit or FrostRose (kmspico). Be careful where you download. (Hint = kmspico for Office 10 "psw 2016)
5. Or just buy a cheap key for around $15.
If "Change Producy Key" is not showing . . .
C:\Windows\System32> slmgr.vbs -ipk "INSERT-YOUR-PRODUCT-KEY"
User folders on different drive.
I resisted upgrading my existing PCs because I keep my user folders on drive D. Crazy thing I can't remember if Win 10 upgrade recognized that my user folders were on D: or if I needed to move the C: folders after upgrade. The good news is, it must have been no big deal or I would have remembered. I think Win 10 just recognizes your folders are not on C: and respects the setup.
Monday, December 9, 2019


Monday, November 25, 2019
Windows 10 Install
slmgr /xpr
slmgr /dli
slmgr /dlv
wmic path softwareLicensingService get OA3xOriginalProductKey
UKV (Ultra Virus Killer) under system info will show the key
Need an earlier version of Windows 10? Use this batch script.
... Just Sayin' - After many flawless 7 to 10 upgrades, I have run into 3 no go machines. After several attempts at trouble shooting failed, here is my suggestion. Rejoice in the opportunity to do a clean install and call it a good day.
... Additional Install Info Here
First backup system with AOMEI Backupper.
AOMEI will ask for an email to enable download. I use yep@nope.com :) It will take anything.
Find and record your Windows product key.
*It may be on a sticker (best way)
* or try this https://nirsoft.net/utils/product_cd_key_viewer.html
(This should work because it reads the key stored in Windows registry)
Download Media Creation Tool
(Using a fresh version will diminish time for updating during install.)
https://www.microsoft.com/en-us/software-download/windows10
Start Media Creation Tool
Choose your flash drive as destination.
I never choose "use settings from this PC".
***I assume you have backed up all your data somewhere***
After completion you can start setup from the flash drive from within Windows 7.
This in-place upgrade works well but does not always work. Give it a shot.
If the in-place upgrade works you will not have to worry about the product key.
(A clean install is always preferable but don't fret over not doing the clean install. You can always do it later, once the authentication has been established.)
I boot from the created flash drive and run setup.exe.
For in-place upgrade things will be automatic.
If doing clean install:
*** Make certain only ONE hard drive is connected. ***
Choose "I don't have a product key".
Choose the version that matches your previously authorized version for which you have a key..
Choose "Custom Install"
Delete the partitions of your old Windows install.
Choose "Next" on the newly unallocated space.
Bingo - Installing Windows
LoL - Now we have some important setup to do . . . or so it says. Windows does it all.
After all that important work is done . . .
Create an off line account (the fine print at the bottom left)
No harm in using your MS account but I don't do it.
Now say "NO" to everything . . . or not
Now Wait until the system pops up.
No need to hurry authenticating but nice to know if it works.
Right Click on My PC
Click "Change My Product Key" lower right.
Copy/Paste the key into the dialog box - or type it :)
Good work. You are in a happy place.
You may (or not) wish to move user folders to D drive.
You may wish to "shut up" Windows 10
https://www.oo-software.com/en/shutup10
You may want to debloat Windows 10
http://bighugethingcomputing.blogspot.com/2019/04/windows-10-debloat.html
Windows 10 versions:
I have not had any problems with any version of Windows 10 but many people have. If you need to create (download) a specific version - try this https://pastebin.com/bBw0Avc4
This is an example of running the bat file

You may wish to delay feature updates. These are the big time updates which people find problematic. Pro versions allow long delays but the Home versions are much more limited in allowing the delay. Setting a metered download option is said to avoid feature updates in the Home versions.

Once you have a working system, back it up with AOMEI Backupper. It will ask for an email. I normally use yep@nope.com :) It will take anything.
Bonus info: Your entire old Windows system is saved on the boot drive as "Windows old" folder in case Windows needs to revert to the old system.. It is big and you will want to eventually delete the folder but don't hurry in case you need to revert. Use Windows own "Disk Clean-up" to remove the file. You can't simply delete it in a standard way.
Right Click on the boot drive:


Thursday, September 12, 2019
HFS - HTTP File Server
HFS - HTTP File Server:
Also available in Symenu.
If you are struggling to get Windows to access another PC on the network and need to move some files, this is a good temporary solution. Yes, you could just access the window share with the PC's IP but you do need to set up a share and then remove the share when you are done. With HFS just drag a fold in to share and when you close HFS, you are done.
The program is a single, stand-alone file. Just start the program.
Do this . . . Be sure the server is started.
Don't bother setting up user and password for local networks.
Drag folder or folders in and choose "real folder" option.


On the second PC, open a browser and enter the address of the server. Remember to include the port.
Example: 192.168.1.34:80
Download must be a file. Click on the file to open/download. It will not download a folder.
Example: You have a folder with MiniToolPartitionManager and want to transfer. You must zip the fold to a file. We could say it's a "file" server and not a "folder" server :)

Monday, September 9, 2019
MoCA Internet Over Coax
I have an Orbi mesh router and WiFi speed is fantastic. However, my Nvidia Shield WiFi was unsatisfactory and irritating. This did the trick. Does it totally cure the Shield's weak network speed?
No - but it is a dramatic improvement. I'm convinced that my Shield has a problem with network speed. I have several and they differ in how well they handle speed.
Actiontec Bonded MoCA 2.0
I receive Internet only from Spectrum. My TV comes from a roof UHF antenna.

One side of splitter goes to the MoCA IN
MoCA OUT goes to Modem
Connect NIC to a Router port

Other side of splitter goes to TV distribution.
I connected to an open port and it worked fine.
I did not need a second diplexer splitter as you might need if your TV and Internet signals conflict.

If you need to use a diplexer, here is a diagram. You can find this diagram in one buyer's comments on Amazon also.


Tuesday, August 27, 2019
Upgrading To Windows 10
* * * Use Windows Media Creation Tool * * *
2021-12-15 I assumed refurbs with XP license would not authenticate but I just did one. Trying a second one now. Second one didn't work but picked up the autopico volume license.
2021-12-15 I assumed refurbs with XP license would not authenticate but I just did one. Trying a second one now. Second one didn't work but picked up the autopico volume license.
slmgr /xpr
That is the short version. Don't bother waiting for Windows Update to offer it.
I bought a refurbished Lenovo X1 Carbon Gen 3 and it had a registered version of 8.1 Pro.

I normally do a clean install of Win 10 but wanted the upgrade experience.
Every site said update your current version and wait for Windows to offer upgrade.
Forget it . . .
Creation Tool will offer upgrade option in place. It worked fine.
You should grab the current Windows key just in case.
Use Nirsoft Keyfinder or look for a sticker on the PC.
If all else fails and you don't want to run your own KMS hack . . .
. . . buy a cheap key here. Many Youtubers offer further discount codes.
***And other ways to read the Original Windows key from BIOS
RWEverything (click ACPI icon from the top toolbar, and MSDM table in ACPI table)
or
Open a Command Prompt window and run the following command:
(wmic path softwarelicensingservice get OA3xOriginalProductKey)
or
FirmwareTablesView (read MSDM)
Need an earlier version of Windows 10? Use Rufus. It may take a little fiddling but the "Download" button is what you want.

Tuesday, August 13, 2019
SSD Benchmarks Two Different PC's and More
A $24 Kingston A400 on USB3
(Different PC's will vary widely with same drive.)


If you are so lucky to have a mobo that handles Nvme
(Not impressive but a cheap one.)

Thursday, August 1, 2019
Windows Slow Shutdown
Make Shortcut shutdown.exe -s -t 00 -f
chkdsk /r /f /x
HKEY_LOCAL_MACHINE\SYSTEM\CurrentControlSet\Control\Session Manager\Memory Management\ClearPageFileAtShutdown set to 0
sfc /scannow
DISM /Online /Cleanup-Image /ScanHealth
DISM /Online /Cleanup-Image /RestoreHealth
restore health not work Win7
Try System Update Readiness Tool
Reduce some closing time setting in registry or use Windows Ultimate Tweaker
(Should not go below 2000)

Ongoing . . .
I did may of these at once plus installed an old video card to handle the two monitors instead of using the Intel onboard adapters. It drops like a rock when closing, even when using standard shutdown. It took forever before. Who knows which ones worked.
Winaero Tweaker can add Shutdown on desktop context menu among other shutdown options.
Friday, July 26, 2019
Dell Vostro 620 No AHCI BIOS Option
Note: If you don't trust using this file, the original BIOS can be modified by yourself with the correct program. I would not bother because the file offered below works fine. This simply reveals setting that are already built into the BIOS but not allowed by Dell. I think Dell simply screwed up and never bothered to fix it when they offered updates. SSD speeds did increase but are still pathetic in comparison. This may be due to an inferior chipset. It is Intel and mine is up to date and running as SATA 6GB but disappointing. Still far better than standard hard drive. I will post speed test results later.
(Why do you need original Dell A10? The file below is the extracted and modified A10.exe zipped. You will need Dell's original A10.exe to initiate the process. When run it will extract into the temp folder. You will simply copy these files below into Dell's A10 temp folder. One file will not copy because A10.exe is still open and using that file. It has not been changed and need not be copied. The instructions explain renaming the A10AHCI.bin file to A10.bin so be aware. The process is simple but must be followed. I think the only file that has been changed is the .bin but I copied all of them anyway.)
(Bonus: I think this BIOS also makes dual monitor setting available but I didn't look for it. The board already allows for dual monitors by using existing VGA and HDMI. But if one of those go down you can use an add on card and the motherboard port together. This is probably not a big deal because any card you buy today may likely have two or three ports already.)
I'm explaining way too much and hoped to rely on instructions below. You will seem confused at first because the guy had flashed A10 already and needed to run it again to get the process going for the temp folder/file copy process. A10.exe will refuse to process unless it detects an older version. He tells how to force the process to run. You will not need to force and can simply start the A10.exe file in a normal manner unless you also have already flashed A10.
Someone has already modified the Bios. It is based on A10, which is the most current. Get A10 from Dell. You will need to run A10 but DO NOT push the "update" button yet. Follow the instructions below.
Here is the fix . . .
File download link.
Thread link.
Thread reproduced here in case it disappears . . .
I just downloaded the file. Does not install because I have already unpatched A10 running. Message: "same or older" and I can only choose "quit".
Tried to "downgrade" BIOS by flashing A08 but same message.
Does anyone know a way how to get the A10AHCI installed? A patch to toggle between IDE and AHCI would be great...
Why did Dell disable AHCI in the first place? Angry
Argh wish I had read this before I updated to A10. Silly me, thinking Dell's latest BIOS would have unlocked AHCI.
Now to find a way to downgrade the bios first...
Ok problem fixed! (For a Dell Vostro 260 running Windows 7 64bit)
In Windows 7, I opened a CMD window (run as admin) and traversed to where the MS-A10.exe file was.
Then I typed MS-A10.exe /forceit
BUT DON'T CLICK ANYTHING ELSE YET. Leave the bios updater open.
Go to your temp folder (C:\Users\USERNAME\AppData\Local\Temp\) and the last folder created should be MS-A10. Either manually edit the MS-A10.BIN [using software like AMIBCP] to your preferences, or just copy the already edited BIN from the dropbox file so graciously provided above by ermax (rename his MS-A10AHCI.BIN to MS-A10.BIN).
Now click Update in the bios updater and reboot when it's done.
On bootup, confirm the BIOS now includes SATA settings but don't change them yet.
I let Windows load and then I used Regedit to change the "Start" value at HKEY_LOCAL_MACHINE\SYSTEM\CurrentControlset\Services\msahci to a 0. Rebooted, went back into BIOS and turned on AHCI mode.
Windows automatically loaded new drivers on this boot. I manually updated those drivers to the ones downloaded from Intel here afterwards.
Wednesday, July 24, 2019
Lenovo X1 Carbon
My favorite refurbs . . .
X1 Carbon (1st Gen) 3443, 3444, 3446, 3448, 3460, 3462, 3463 August 2012
(I think from 2nd gen onward, standard m.2 2080 will work)
*X1 Carbon (2nd Gen) 20A7, 20A8 January 2014
*(Avoid 2nd Gen because of trackpad - 3rd Gen returned to original)
X1 Carbon (3rd Gen) 20BS, 20BT January 2015
*X1 Carbon (4th Gen) 20FB, 20FC February 2016
*(4th Gen has odd touch strip for F-Keys)
X1 Carbon (5th Gen) - Kabylake 20HR, 20HQ February 2017
X1 Carbon (5th Gen) - Skylake 20K4, 20K3 February 2017
X1 Carbon (6th Gen) 20KH, 20KG
X1 Carbon 3460 ssd
X1 Carbon 20A7, 20A8
X1 Carbon 20BS, 20BT
X1 Carbon 20FB, 20FC
X1 Carbon 20HR, 20HQ
X1 Carbon 20K4, 20K3
X1 Carbon 20KH, 20KG
Starting gen2 M.2,2280,SATA6. I'm guessing not proprietary socket? Not sure when PCIe happens?
Check Models and get manuals and drivers here
Why do I care about SSD compatibility? The way I use these little guys, I don't need a lot of room. I just think being able to replace the SSD without finding some after market adapter and an abnormally short SSD is another thing not to worry about. I have yet to have a problem so . . .
Why do I care about models? Sellers don't get it right. They will call a 1st gen Carbon a 3rd gen. The CPU is 3rd gen but the Carbon is 1st gen. Anyway, you need to use caution to know exactly what you are getting . . . only to evaluate accurate pricing because a 1st gen Carbon is totally fine.
Gotta love Lenovo driver update. Need to access on line to work properly.
Purchase History (Each of these Gen 1's have been excellent)
Now it seems these prices are high but the prices keep dropping. I would still buy a gen 1 if I needed one but will pull the trigger on a gen 3 or above it the price is right even if I don't currently need one.

Good buy below and love the screen but pushing all those pixels seems to slow performance. I still love the Gen 1 models. Wonder if I will ever use touch?

Thursday, July 18, 2019
Control Android (Shield - Fire) With PC SCRCPY
Bottom Line - I don't use this but it is interesting and does work.
Download the Windows Version of SCRCPY.
(Scroll down the page to find it.)
You can place the unzipped folder anywhere but C:\ is easiest.
Find your Android device's ip eg. 192.168.1.2
On your Android Device, enable developer mode (not needed on Fire).
 Then turn Developer Options ON.
 Turn Network Debugging ON
 Open Command Prompt as Admin
Navigate to the scrcpy folder
Type adb connect 192.168.1.2:555
Watch Android device and accept connection
Then run scrcpy.exe
You should now have a screen on your PC reflecting your Android.
Give some time after commands to allow things to happen.
This "Android" screen on your PC will not be in the CMD window. Look around.
If you have low bandwidth a switch may be needed to use smaller window, eg.
scrcpy -b2M -m800 or scrcpy -b2M -m600
To shut off the server when done use adb kill-server.
This is fantastic when it works. Mouse, keyboard . . . everything works.
However . . . these days, few things are needed for streaming and little typing is needed.
(Several different sources are available for each item.)
Downloader is #1
Fire just say "downloader" into mic.
Shield (thinking-maybe playstore)
APKTime (Get it right away. Several apps for Shield error on download "can't parse package" but I have not run into this with Firestick.)
Kodi
Fire-Downloader http://troypoint.com/kodistable (seems not to be on store)
Shield in Playstore
Current Best Kodi Build
http://xanaxrepo.com/repo/
Current Best APK
UnlockTV APK
Fire-Downloader http://bit.ly/unlocktv
Shield-Downloader http://bit.ly/unlocktv
VPN-Private Internet Access
Seems to be in All Playstores now
Browser
PuffinTV is the best - (Forget all other browsers)
Fire get it from APKTime
Shield get it in playstore
Fast.com Internet Speed Test works well in Puffin. Bookmark it.
https://www.techdoctoruk.com/downloads/ is a good bookmark also.
Youtube (no adds)
This is a moving target . . . So try
https://www.techdoctoruk.com/downloads/
or APKTime
Filelinked is another way to acquire apks. You need an address and sometimes a pin.
This program can be irritating at times.
address 22222222 pin 4754
This address has most current apks
Ciberflix (has worked well but recently iffy)
CinemaHD (can be okay)
Any more than this and you are just playing. Not that there is anything wrong with that :)
Download the Windows Version of SCRCPY.
(Scroll down the page to find it.)
You can place the unzipped folder anywhere but C:\ is easiest.
Find your Android device's ip eg. 192.168.1.2
On your Android Device, enable developer mode (not needed on Fire).


Navigate to the scrcpy folder
Type adb connect 192.168.1.2:555
Watch Android device and accept connection
Then run scrcpy.exe
You should now have a screen on your PC reflecting your Android.
Give some time after commands to allow things to happen.
This "Android" screen on your PC will not be in the CMD window. Look around.
If you have low bandwidth a switch may be needed to use smaller window, eg.
scrcpy -b2M -m800 or scrcpy -b2M -m600
To shut off the server when done use adb kill-server.
This is fantastic when it works. Mouse, keyboard . . . everything works.
However . . . these days, few things are needed for streaming and little typing is needed.
(Several different sources are available for each item.)
Downloader is #1
Fire just say "downloader" into mic.
Shield (thinking-maybe playstore)
APKTime (Get it right away. Several apps for Shield error on download "can't parse package" but I have not run into this with Firestick.)
Kodi
Fire-Downloader http://troypoint.com/kodistable (seems not to be on store)
Shield in Playstore
Current Best Kodi Build
http://xanaxrepo.com/repo/
Current Best APK
UnlockTV APK
Fire-Downloader http://bit.ly/unlocktv
Shield-Downloader http://bit.ly/unlocktv
VPN-Private Internet Access
Seems to be in All Playstores now
Browser
PuffinTV is the best - (Forget all other browsers)
Fire get it from APKTime
Shield get it in playstore
Fast.com Internet Speed Test works well in Puffin. Bookmark it.
https://www.techdoctoruk.com/downloads/ is a good bookmark also.
Youtube (no adds)
This is a moving target . . . So try
https://www.techdoctoruk.com/downloads/
or APKTime
Filelinked is another way to acquire apks. You need an address and sometimes a pin.
This program can be irritating at times.
address 22222222 pin 4754
This address has most current apks
Ciberflix (has worked well but recently iffy)
CinemaHD (can be okay)
Any more than this and you are just playing. Not that there is anything wrong with that :)
Tuesday, June 25, 2019
Chrome Turn Off Hardware Acceleration
Today I worked on a PC and found Chrome not working. It opened to a blank screen so how do you get to settings to turn of hardware acceleration? You can't.


Obviously this PC does not have a problem.
Find the Chrome.exe file and create a shortcut. Add this switch in the target.

Now you can open Chrome and access settings.
Monday, June 24, 2019
Windows Activation
2022-10-26 on Win 10-11 an easy way to find key info is "ShowKeyPlus" from the Microsoft Store.
Yes, we all hate the Microsoft Store.
It is possible your Windows 7 install has a digital activation and no key need to be manually entered. You may be able to install Win10 and it will automatically detect the hardware key.
To be on the safe side, you should retrieve the existing key before install in case you need it.
Nirsoft Produkey
Only problem with Nirsoft is Antivirus will block and you will need to allow it to run.
Nirsoft is most reliable. I have not had the two methods give different results but it is possible.
(There should be a sticker somewhere on the PC with this number.)
(When entering a key do not use spaces)
You can find an existing installed Windows 10 key with this cmd
(be sure you are in the system32 dir)
wmic path SoftwareLicensingService get OA3xOriginalProductKey
Hint: UVK shows key in "system" tab
I use a lot of refurbished PCs. Often they have Windows 10 for refurbs keys but sometimes these keys don't work. It is so easy to fake authenticate without having a key that I never pursued getting the keys to work. This is something I intend to try . . .

I use a lot of refurbished PCs. Often they have Windows 10 for refurbs keys but sometimes these keys don't work. It is so easy to fake authenticate without having a key that I never pursued getting the keys to work. This is something I intend to try . . .

Wednesday, April 24, 2019
Windows 10 Debloat
Chris Titus Debloat (I haven't tried yet)

This is the GUI
(I install NET v3.5 because programs I use need it.)

Right click + Power Shell does not always give you the admin option. The script must be run in Power Shell as admin. You may need to do this . . .
- Download the .zip file on the main page of the github and extract the .zip file to your desired location
- Once extracted, open PowerShell (or PowerShell ISE) as an Administrator
- Enable PowerShell execution
Set-ExecutionPolicy Unrestricted -Force - On the prompt, change to the directory where you extracted the files: e.g. - cd c:\temp
- ***If a space exists in syntax put string in single quotes eg. cd 'D:\User\Two Words'
- Next, to run either script, enter in the following: e.g. - .\Windows10DebloaterGUI.ps1
- ***Do not mis the .\ or it will not run :)
- You may or may not be asked to type "R" to run. Just do it.
Tuesday, April 23, 2019
Tron Virus Removal Script
Download the script from here.
Look for the post on recent version and open it.
Example:

View how to use it here.
I have never used this but plan to try if and when I ever have virus trouble.
Look for the post on recent version and open it.
Example:

View how to use it here.
I have never used this but plan to try if and when I ever have virus trouble.
Windows 10 Feature Update Delay
Windows as of v2004 has removed the delay update feature.
... This may be the answer
Says only Pro but not sure if true.
I don't do the following because it stops some programs I use of performing. It may be easier to simply set you connection as "metered".
(It can be frustrating to remember what step (of the several available) you chose to delay updates.)
Windows 10 Home does not allow Feature Update Delay but . . .
Add Group Policy Editor like this . . .
Then do this . . .

... This may be the answer
Says only Pro but not sure if true.
- Use Windows-X to open the admin menu.
- Select Windows PowerShell (admin) from the list.
- Run the following commands (make sure you change XXXX in the second command to the desired target version, e.g. 1909:
- reg add HKLM\SOFTWARE\Policies\Microsoft\Windows\WindowsUpdate /f /v TargetReleaseVersion /t REG_DWORD /d 1
- reg add HKLM\SOFTWARE\Policies\Microsoft\Windows\WindowsUpdate /f /v TargetReleaseVersionInfo /t REG_SZ /d XXXX
Making the registry changes with one click . . .
- Enter the following in a NotePad and save as "somename.reg"
Windows Registry Editor Version 5.00
[HKEY_LOCAL_MACHINE\SOFTWARE\Policies\Microsoft\Windows\WindowsUpdate]
"TargetReleaseVersion"=dword:00000001
"TargetReleaseVersionInfo"="2004"
A list of versions to name the "target release" can be found here.
I don't do the following because it stops some programs I use of performing. It may be easier to simply set you connection as "metered".
(It can be frustrating to remember what step (of the several available) you chose to delay updates.)
Windows 10 Home does not allow Feature Update Delay but . . .
Add Group Policy Editor like this . . .
Then do this . . .

Monday, February 11, 2019
Make Sleep Shortcut
To create a shortcut that will execute the sleep command:
- Right Click in the desired location (On the Desktop or in a folder)
- Select New -> Shortcut
- In the “Type the location of the item” field enter the following
- C:\Windows\System32\rundll32.exe powrprof.dll,SetSuspendState 0,1,0
- Click Next
- This will create a shortcut with the name rundll32,
- Right Click the shortcut, select Rename and type in Sleep
You can now open this shortcut whenever you desire to put your computer into sleep mode.
Note: You can replace the default icon with a Shutdown one by:
- Right Click the created shortcut, select Properties -> Change Icon
I like this little guy

Use a free portable icon editor to make a true Windows icon.

Sunday, February 10, 2019
ImageUSB Experience
ImageUSB works well to image/backup/clone a bootable USB drive.
One issue is writing a smaller image to larger Flash Drive.
I expanded the space with MiniTool but it no longer booted.
ImageUSB will allow expanding the space but only with NTFS format. Most of these boot drive creators like FAT32. I have not tried the NTFS route yet.
I simply created an added partition on the empty space.
Why not use AOMEI? It threw errors about locked partition. It should work but I got sick of testing. May get back to it at some point. I didn't run as admin so that may make a difference.

Sunday, February 3, 2019
AOMEI OneKey Recovery Partition
I don't think I would bother with this on my personal systems. I would stick with standard imaging and boot to USB stick to recover using AOMEI Backupper. Both programs create the same image.
Generally this sets up a dual boot option and installs a WinPE partition on your boot drive. The AOMEI program on the WinPE partition has two options: 1. Create a system backup image somewhere. 2. Restore from an existing system backup image.
So why use it? On PC's being operated by individuals unfamiliar with these types of backup and recovery. No need to create boot media and/or fool around with how to boot from that media.
The free version does not allow the second option.
I'm new to using this but this is what I see happening.

Either choice you make creates an AOMEI boot partition on your main boot drive.

If you choose the second option the system image will be stored on another drive location of your choosing. I have not tried the first option yet but who would want the image stored on the boot drive unless it is the initial smaller original install of Windows. Or maybe you have a monster boot drive?

After the image is made and stored you will be given an option of enabling an F11 option upon boot up to access the AOMEI PE environment. The default message duration is 3 seconds. This is not enough but maybe 5 seconds will work. Also be aware that your PC may already have an F11 hot key to access the BIOS boot menu and you would need to wait to get past that. It can be confusing.

If you need to correct the duration.
The amount of time the F11 option shows can not be changed after initial setup (I don't think).
But the Windows dual boot selector is standard BCD stuff.

Really, the F11 setup is a non event. If this is set up for novice protection, the F11 will just complicate his life. You will have a dual boot setup and the option will present itself.
1. Boot into Windows
2. Boot into AOMEI
Just make sure the option is presented long enough to allow a normal human to make a selection.
Second Win7 PC would not install. I started the process and then would reboot into Windows repair.
Generally this sets up a dual boot option and installs a WinPE partition on your boot drive. The AOMEI program on the WinPE partition has two options: 1. Create a system backup image somewhere. 2. Restore from an existing system backup image.
So why use it? On PC's being operated by individuals unfamiliar with these types of backup and recovery. No need to create boot media and/or fool around with how to boot from that media.
The free version does not allow the second option.
I'm new to using this but this is what I see happening.

Either choice you make creates an AOMEI boot partition on your main boot drive.


After the image is made and stored you will be given an option of enabling an F11 option upon boot up to access the AOMEI PE environment. The default message duration is 3 seconds. This is not enough but maybe 5 seconds will work. Also be aware that your PC may already have an F11 hot key to access the BIOS boot menu and you would need to wait to get past that. It can be confusing.

If you need to correct the duration.
The amount of time the F11 option shows can not be changed after initial setup (I don't think).
But the Windows dual boot selector is standard BCD stuff.

Really, the F11 setup is a non event. If this is set up for novice protection, the F11 will just complicate his life. You will have a dual boot setup and the option will present itself.
1. Boot into Windows
2. Boot into AOMEI
Just make sure the option is presented long enough to allow a normal human to make a selection.
Second Win7 PC would not install. I started the process and then would reboot into Windows repair.
Subscribe to:
Posts (Atom)
Pin Not Available
Crazy Error I had not seen before. Pin not available blah blah. I restarted a few times and it finally worked. If it doesn't some say to...
